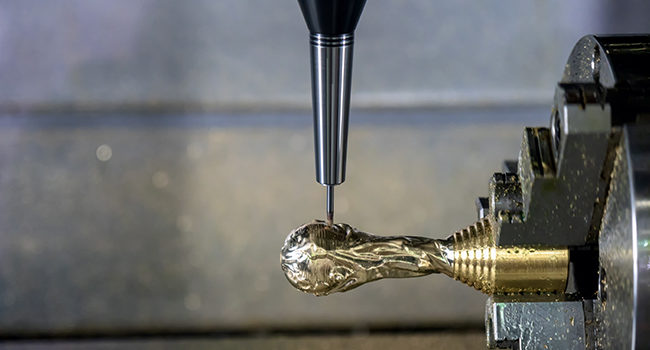
Mastercam Multiaxis add-on is designed to provide practical multiaxis machining strategies for simultaneous 4- and simultaneous 5-axis machining. It’s available for add-on for Mastercam Mill 3D, Mastercam Router 3D, Mastercam Mill-Turn, and Mastercam for SOLIDWORKS. Its interface is intuitive, but savvy users can maximize their multiaxis proficiency by diving into these five concepts.
1. 3 + 2 Machining

3 + 2 machining is not necessarily a standard multiaxis technique; it’s more of a stepping stone into simultaneous 5-axis machining. In 5-axis machining, the tool can meet the material at an angle around the X-, Y-, and Z-axes and can adjust this angle as machining progresses. With 3 + 2 machinings, a 3-axis program is run on a 5-axis machine so that the tool can be held at a fixed angle that isn’t necessarily 90°, but this angle cannot be changed during machining. Luckily, this technique is supported by basic Mastercam Mill, so any Mill user can experiment with multiaxis techniques. Starting with 3 + 2 machining allows users to exercise their creativity over toolpaths and sequences of orientations.
2. Part Placement, Fixture Design, and Machine Simulation

For most parts machined on a 3-axis machine, a machinist will start the decision-making process by selecting the fixture first and the toolpath strategies next. With 5-axis machining, however, machinists can prioritize finding the absolute best toolpath strategies without wasting time selecting or designing fixtures. This is because 5-axis machining makes it possible to cut apart on all but one side (the side being held by the fixture). The result is an optimized machining process that is completed faster and produces better finishes. To find these optimized toolpaths, users should use the software’s built-in simulation solutions. Simulation allows programmers to test different techniques and processes without ever endangering their physical material or tools.
3. Familiarity with Tools, Holders, and 5-axis Machine Tools

A prerequisite to multiaxis programming is spatial awareness of all moving parts. In 3-axis machining, the main concern with tool holding is how far the cutting tool extends from the holder. With 5-axis machining, though, shorter tools and tool holders are possible to use. The holder may come very close to the fixture, rotary table, or part feature during machining as it tilts around the part. For this reason, the tool extension from the holding piece is still important, but the tool holder must be precisely and accurately defined. This definition will prevent potential near misses or even collisions with a machine component. The same is true for fixtures; they must be modeled and defined accurately to keep machining safe.
4. Familiarity with the Three Major Toolpath Controls
The last thing programmers want is to have spent the time optimizing a part’s program just to witness a collision on the machine. Mastercam Multiaxis comes with three toolpath controls to eliminate this risk.
- Cut Pattern: In Multiaxis, there are many additional cut patterns aside from the standard patterns (i.e. Contour and Pocket). For example, users can use Spiral to send the tool along with a spiraling pattern around the blade of an impeller or the exhaust port of a racing engine.
- Tool Axis Control: Programmers can set customized tilt axis limits for their tools to remain within machine tool limits, protecting the part from gouges and the tool from damage.
- Collision Control: Multiaxis provides a 5-axis safe zone around the machined part as a safety buffer and comes with advanced gouge-checking to confirm that there will be no unexpected mistakes.
5. Familiarity with the Most Popular Multiaxis Toolpaths
- Unified 5-axis: New to Mastercam 2022 and the result of customer feedback, with the Unified toolpath users, need only select their Drive and Avoidance geometries once before being able to experiment with Cut Patterns. Not needing to reselect geometries every time will save mouse miles and time.
- Deburr 5-axis: Sharp edges are common occurrences on completed parts. Deburring those edges is a challenging manual task and keeping up consistency is nearly impossible, but Deburr’s 5-axis automates this process.
- Curve 5-axis: This toolpath is one of Mastercam’s oldest and most popular. The cut pattern follows a curve (a line, a spline, a circle, or a surface edge) that can be wireframe, solid, or surface.
- Swarf 5-axis: Sometimes called “Flank-milling,” Swarf 5-axis uses the side of a tool to cut a wall. It is very popular in aerospace milling.
Getting the Most Out of 5-Axis

Mastering 5-axis machining takes time. Once users learn the interface, the flow of toolpath creation, and the sequence of controls, though, they unlock the real power of multiaxis machining. And accessing 5-axis toolpaths has never been easier than with the unified multiaxis user interface, new with Mastercam 2022.
This content was originally published on the Mastercam website.
